
Flooring Tips
6 Easy Steps For Installing Vinyl Flooring

Feb
(Featured is our Armstrong Flooring Smokey Brown Vinyl Floors)
Vinyl flooring is cost-effective, simple to maintain, and looks fantastic! It’s a wonderful method to rejuvenate any space without breaking your wallet.
If you’ve never installed vinyl flooring before, you may be unsure of how to go about it. If that’s the case, we have good news-it’s a process you can do yourself, given you have the time and tools. We’ll walk you through every step of the process, from start to finish. As always, be safe when handling any sharp tools, and remember that this is a set of tips and is not meant to be some sort of comprehensive contracting class. If you’re unsure of something, leave it to the professionals!
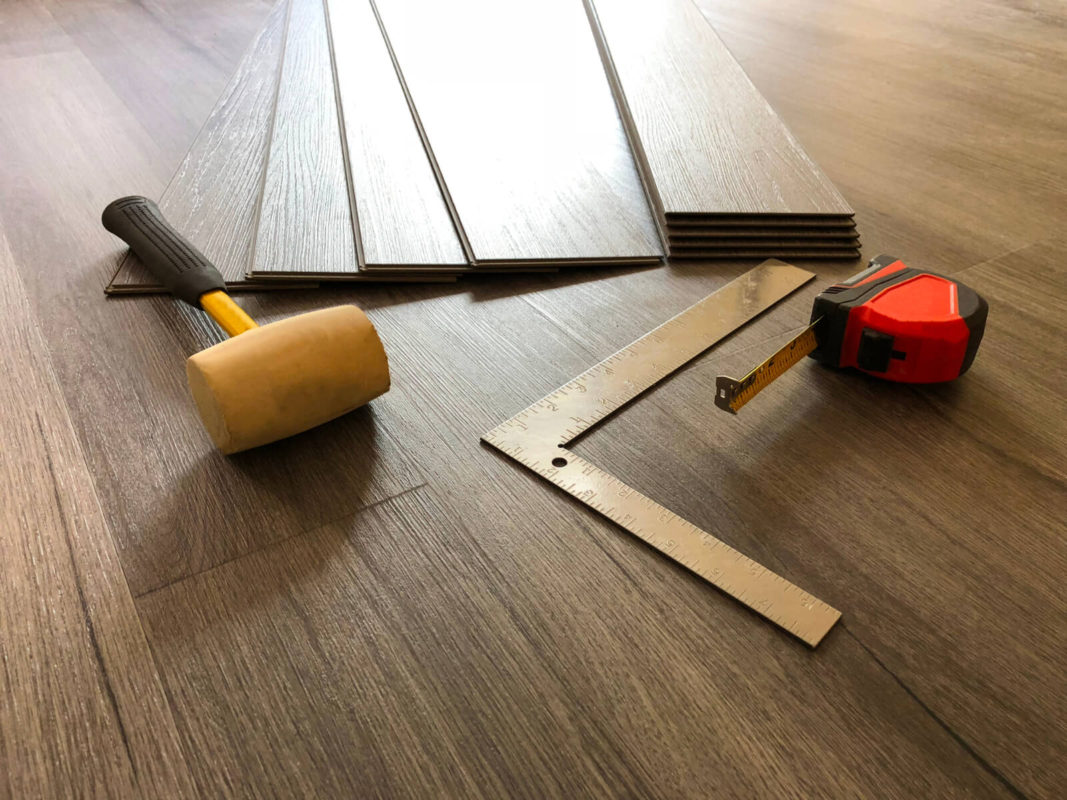
Tools & Materials Needed:
You’ll need the following tools to fully install your vinyl floors. If you think there’s a chance you’ll be buying one of these tools and never using it after your floor installation project, consider using a vinyl flooring installation service, like ours at Flooring Liquidators, to have your project done quickly and without the hassle. If you’re set on doing it yourself, feel free to browse our selection of vinyl floors for amazing prices– we’ll match any written offer! Here’s some tools you’ll need if you’re doing the work yourself:
- Your choice of vinyl plank/tile flooring
- Underlayment (if you’re laying a floating floor)
- Measuring tape
- Level
- Spacers
- Chalk line
- Grinder or sander (if your floor isn’t completely flat)
- Self-leveler
- Jigsaw
- Flush cut saw
- Circular saw
- Brad nailer
- Rubber mallet
- Tapping block
- Drawbar tool
- Carpenter’s square
- Utility knife
- Metal putty knife or pry bar
- Transition trim
- Quarter round/shoe mold
Before you begin, it’s a good idea to sketch out the arrangement. You may even lay your flooring out before fixing it in place. That’s a wonderful approach to see how the vinyl flooring will turn out once it’s done.
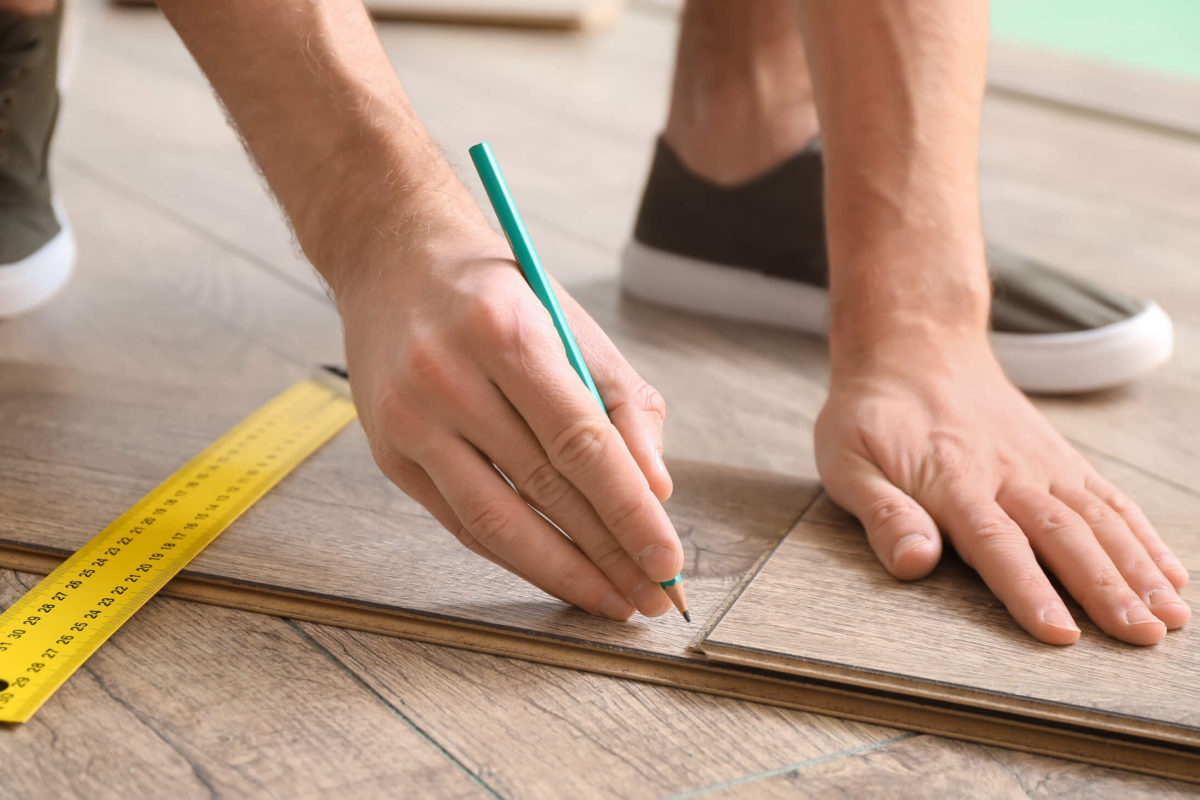
Step 1: Measure Your Space
Begin by determining the area you’ll need to cover. You’ll be able to get the right amount of tiles/planks needed for your project once you have correctly determined the measurements.
Determine the room’s width and length, then multiply them together. If your space is square or rectangular, the result will be its surface area.
If the room’s shape is irregular, break it down into smaller rectangles and squares to determine its surface area. Then add them together to get the total.
If you plan on laying your planks/tiles in a straight line, add 10 percent to the above total. That will provide you with the amount of flooring you need to buy, with some extra if needed (if you accidentally damage the floor while laying it, for instance). If you’re going to lay them in a pattern, like for example herringbone, add an extra 15 percent to your total.
Step 2: Plan The Layout
Next, choose which direction you want your planks to run, and consider where you’ll place each row. You don’t want to end a column of planks with a piece of vinyl that’s too short. You also don’t want a very narrow row at one end of your flooring.
To avoid any weak areas, stagger the joints. Between rows, most experts recommend offsetting joints by at least six inches.
Pro tip: When it comes to choosing which direction to lay your vinyl planks/tiles, personal taste is very important. However, if you’re flooring a space that comes into contact with a hallway, laying the boards in the same direction may be more aesthetically pleasing. Also if you run them towards a light source, the room will appear more open.
Step 3: Prepare Your Space/Floor
Before you begin, place your vinyl flooring in the room where it will be installed for at least 48 hours. This will allow the vinyl planks/tiles time to acclimate to the right temperature and humidity levels before installation.
Make sure your sub-floor is clean and level. Check for a difference of no more than 3/16 of an inch in 10 feet using a level. If necessary, use a self-leveller to fill in any low areas and sand or grind away any high spots.
It is important to note that if there is old vinyl flooring present, do not sand it! Older flooring may contain asbestos, this can be highly dangerous if inhaled.
Remove any baseboards that make contact with the floor using a pry bar. If there’s paint sticking them down, scrape the utility knife along the edge to remove it.
You may also need to trim the door jambs. Lay a vinyl plank on top of the subfloor to check this. If it is higher than the old jambs, mark the level on the jamb. Remember to leave 1/16 inch extra for caulking when you’re finished. Then cut the jambs to size. Install spacers around the base of the walls to ensure that your planks have adequate room to expand as the temperature and humidity fluctuate.
Step 4: Set The Underlayment
A thin covering material, such as underlayment, covers the subfloor and is then topped with the finish flooring material. Underlayment serves a variety of purposes, including sound deafening, softening the floor’s surface feel, and providing a moisture barrier.
Underlayment is required if you’re installing a floating floor- for example, flooring that doesn’t adhere directly to the sub-floor.
Lay the underlayment in the same direction as your vinyl flooring. Unroll it, then cut the first length to fit your wall. Repeat with the next row, overlapping slightly. You can get self-adhesive underlayment – with this all you need to do is press it into place. If yours is not self-adhesive, you may cover the seams with underlayment tape. Continue until the whole floor is covered, cut off any excess with your utility knife.
You’re now ready to begin laying your vinyl planks/tiles.
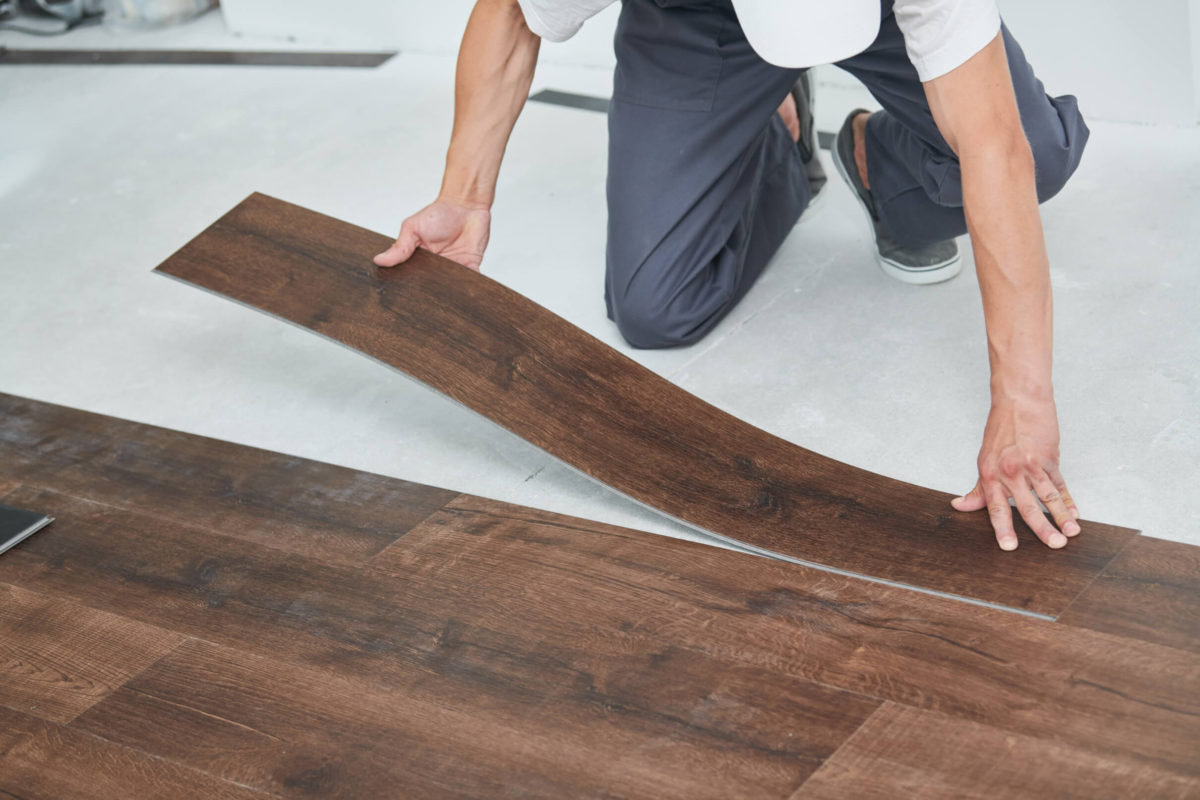
Step 5: Laying Down The Vinyl Flooring
You may need to cut your first row of planks to get a straight line. If this is the case, use a circular saw to do it. Most planks can be scored and snapped with ease, but the saw will give you a neater finish.
Place the tongue of the second plank in the groove of the first after your first plank is in place. Tap them firmly together using your tapping block and rubber mallet.
Make sure the tapping block is pressed against the cut side of the plank. This will protect the interlocking portion that connects the two planks from being destroyed. Tap with the mallet to make sure there is no space between any of the planks.
Step 6: Installing The Final Plank
The final plank of any row is a little more difficult.
To begin, determine the length you’ll need. Using a carpenter’s square, draw a line along the cut, and score and snap the plank. If it doesn’t snap cleanly, you may trim it with your flush cut saw. Place the tongue in the groove of the previous board. To secure it in place, use your drawbar tool. Tap lightly on the other end of the tool to bring the junction together. Hook one end of the tool over the board’s end. Then softly tap on the tool’s other surface to close up the joint.
Repeat the procedure for each new row. To achieve a natural look, stagger the joints at irregular intervals. Once all of the planks are in place, use your drawbar and mallet to make sure everything is secure. You may now remove the spacers from the bottom of the walls.
Now it’s time to install your quarter-round or shoe mold. Keep in mind that you want to attach it to the walls rather than the floor, since the latter must be able to expand and contract.
Last but not least, install the transition trim between your new floor and any other floors.
You’re all done! Sit back and enjoy your new vinyl floors!
Take your time when preparing for your vinyl flooring project. Sketching your layout, or even laying out your planks before you fix them in place will help you avoid mistakes. Don’t forget about transition strips, baseboards, and trims for a professional look. They’ll make all the difference in getting a high-end finish.
Pro Tips From Flooring Liquidators
Choose a thicker vinyl plank if your subfloor isn’t very smooth. This will help to hide any flaws.
Remember that you can cut off excess but you cannot add pieces back on – Be careful when you’re cutting underlayments for vinyl planks/tiles
If a plank won’t fit properly against another, look for debris in the groove. To clean out the groove, run the blade of your utility knife gently along it. It may also be helpful to give the board a little twist as you install it to fit it into place.
We hope this was helpful and informative! If you’re taking a look at the steps above and are excited for your next vinyl flooring project, that’s great, but if you think you may need a little help, we encourage you to look at our vinyl flooring installation service or call us at 1 (866) 473-7222 for more information. Thanks!